Ingenious.V12 has integrated word processing in more than one location. It is accessible in the detail view of an article in the area “Formatted text (RTF) in the column “Item texts” . You will also find word processing in the detail view of the workflow module and in the “Purchasing” module in the column “Print preview" in the header and footer text of the “Items” column of the work flow modules and in the text administration module.
Although word processing appears visually different from other word processing in the “Items” module, there is no difference in application and effectiveness.

Word processing in the “Items” module

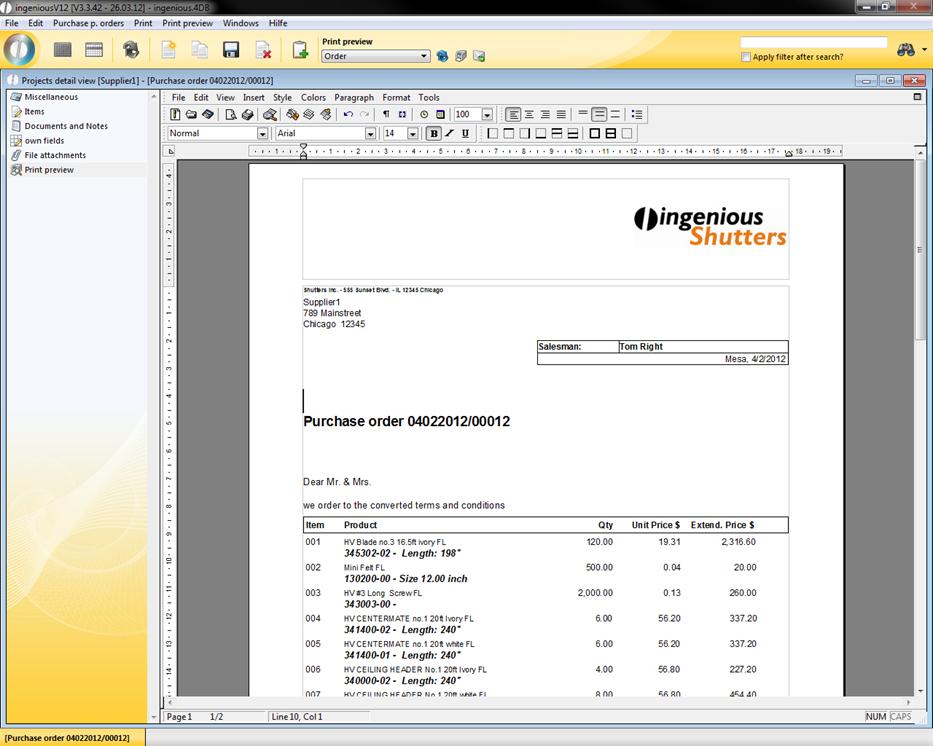
Word processing in the “Purchasing” module
With word processing in the “Items” module, not all toolbars are displayed. This can be changed as necessary under the menu item “Displays/Toolbar...” in word processing.
Some of the functions of word processing can be accessed by key combinations. The key combinations are displayed in the menu next to the functions.
The menu bar
All formations and settings can be made in the menu bar while editing.

This consists of nine menu items that will be explained in more detail below.
Menu item “File”
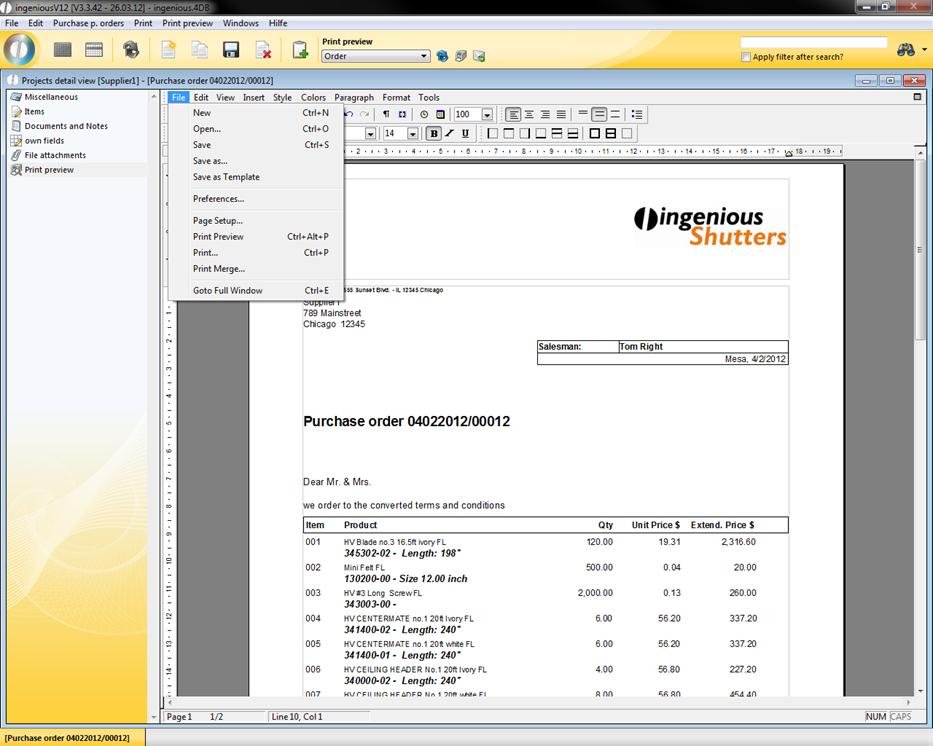
The menu item “File” is widely standardized. That means that you will find the commands “New”, “Open”, “Save”, “Save as”, “Page setup” and “Print” in most other word processing programs. In order to view a document that has been written with the integrated word processing from Ingenious.V12, i.e. in “Word” from “Microsoft”, you must save it with the file ending in “doc”, “rtf”, or “txt”. Documents saved in this manner can be opened in almost all text editors. In order to view external data files in the word processing by Ingenious.V12, the documents should also be saved in one of the above mentioned three formats. Behind the command “Preset” there is a window, in which numerous settings for the document are available, such as the page number, or if there should be differences between individual pages. With the menu item “Print preview” a new window opens in which your current document can be viewed as a printed version. The menu item “Entire window” enlarges the area of word processing to almost a full screen format, in order to also have an overview with larger texts.
Menu item “Edit”
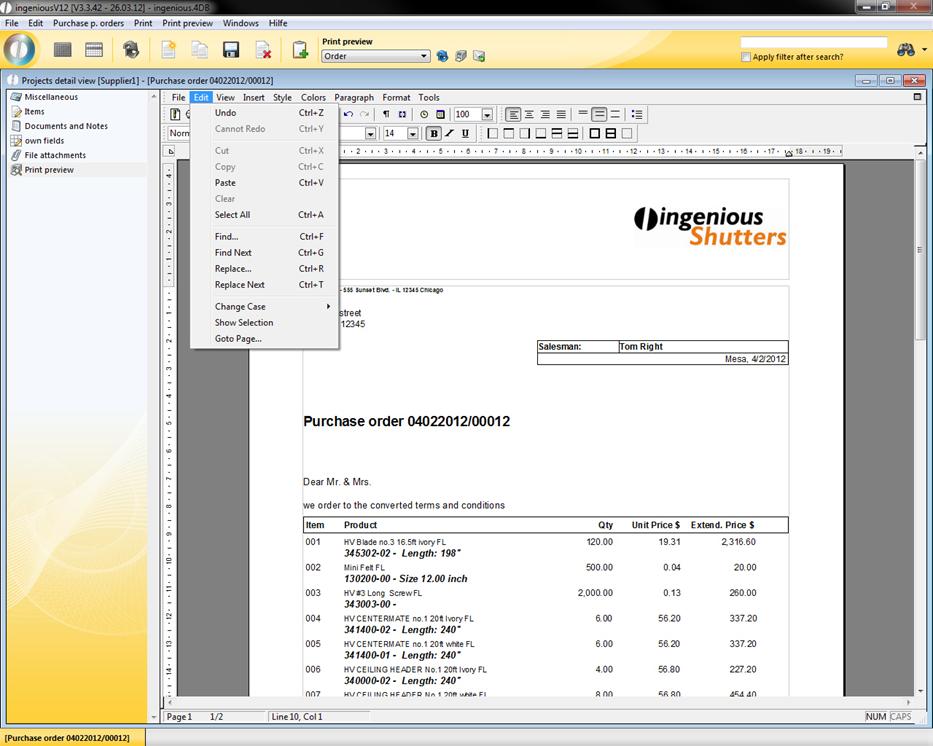
In the menu “Edit” you will also find numerous standard entries. Here the entries “Upper case letters”, “Display selection” and “Go to page...” are distinctive features. Behind “Upper case letters” there are formatting possibilities for highlighted texts. Here you have the choice between ALL CAPS and all lower case. Only the beginning caps and ONLY THE BEGINNING LOWER CASE. With the “Go to page...” entry, a quick jump to the next page is always assured. Now scrolling across several pages is a thing of the past.
Menu item “View”

In this menu, there are numerous entries that facilitate the precise creation of documents such as the entries “Normal” and/or “Page” for example. From these two items, only one can be active and is recognizable by the checkmark. The standard setting is “Normal”. If one selects “Page” the entire page to the margin is displayed. In addition, the areas for header and footer text and main text are shown separately. In the menu item “Toolbar” there is the possibility to expand or minimize the toolbar with the symbol groups “Format”, “Style” and “Borders”. With the “Ruler” entry you can display or remove the ruler shown in the upper margin. With this ruler you have the possibility to precisely align the texts and specify your own tab stops. With the menu item “References” you can determine how the references can be displayed. In addition, the areas for the header and/or footer and main text are separately displayed. Behind the menu item “Toolbar” you have the possibility to expand or minimize the toolbar with the icon groups “Format”, “Style” and “Frame”. With the entry “Ruler” you can display or remove the ruler shown in the upper margin. With this ruler you have the possibility to align the texts precisely and specify your own tab stops. With the menu item “References” you can determine how the references can be displayed. References are links to the fields whose values are variable, such as the fields for date, time, hyperlinks, 4D printouts, HTML printouts and page numbers, for example.
References not displayed
References displayed
When you display the references, you recognize to which internet page the hyperlink leads. When you erase the standard checkmark in the field “Images”, no pictures will be shown or printed in the document. The pictures remain in the document and can be displayed again as necessary (place checkmark). With the “Vertical picture status bar” entries, you can activate or deactivate the moving possibilities of the visible area of your document. Also, the “Menu bar” can also be removed with the same named entry. That is not advisable because it is only available with a new opening of the text editor. The “Status bar” offers you additional information for the document, such as on which page, which line and on which column you are.
Menu item “Insert”
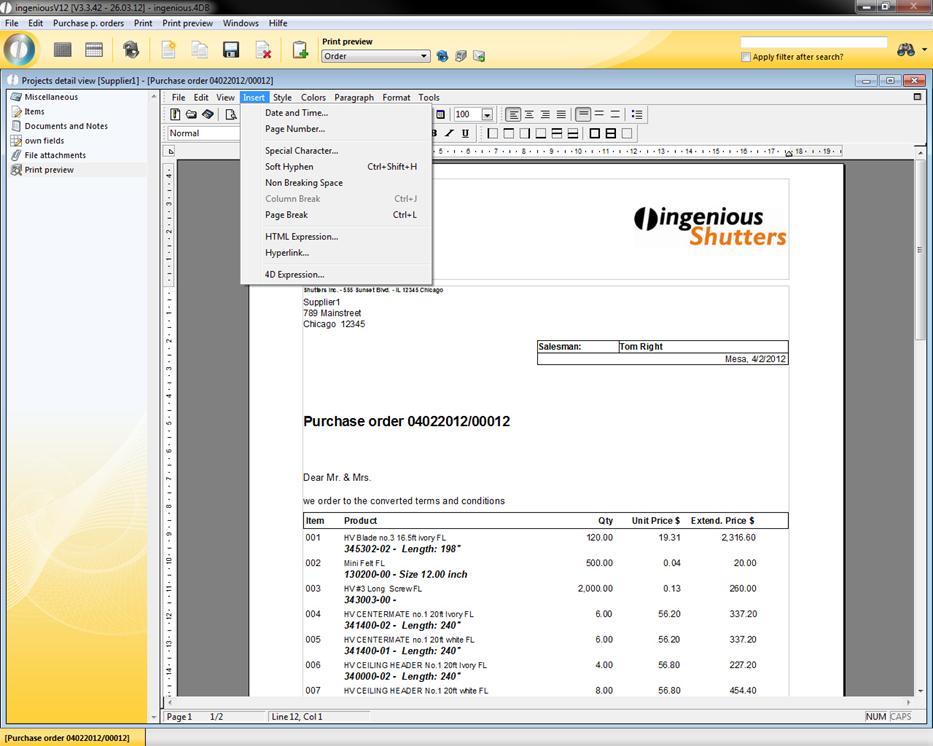
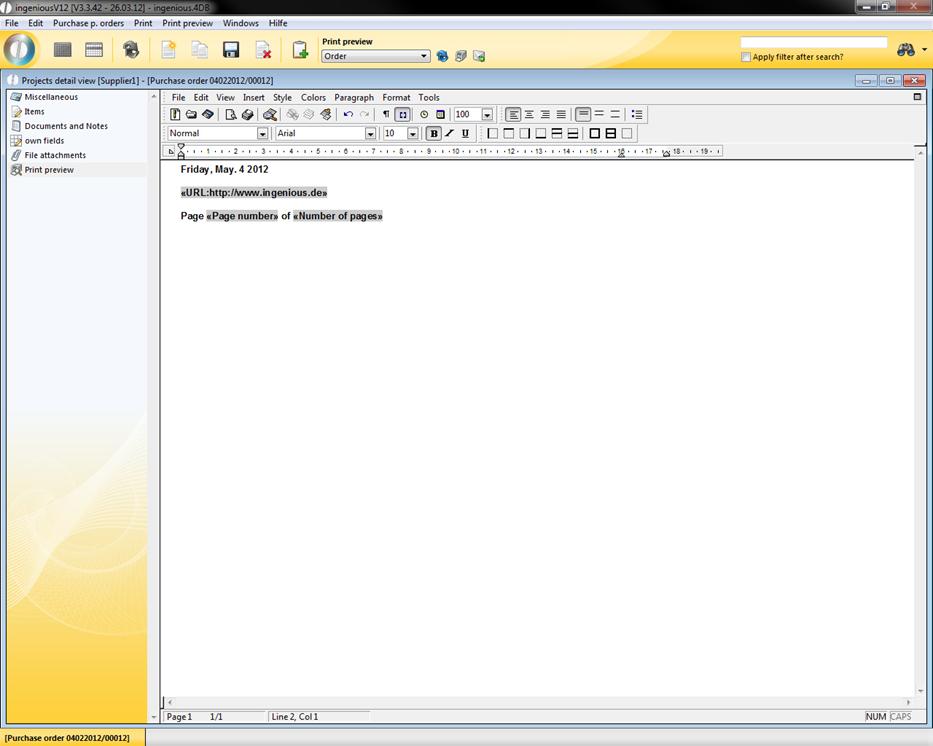
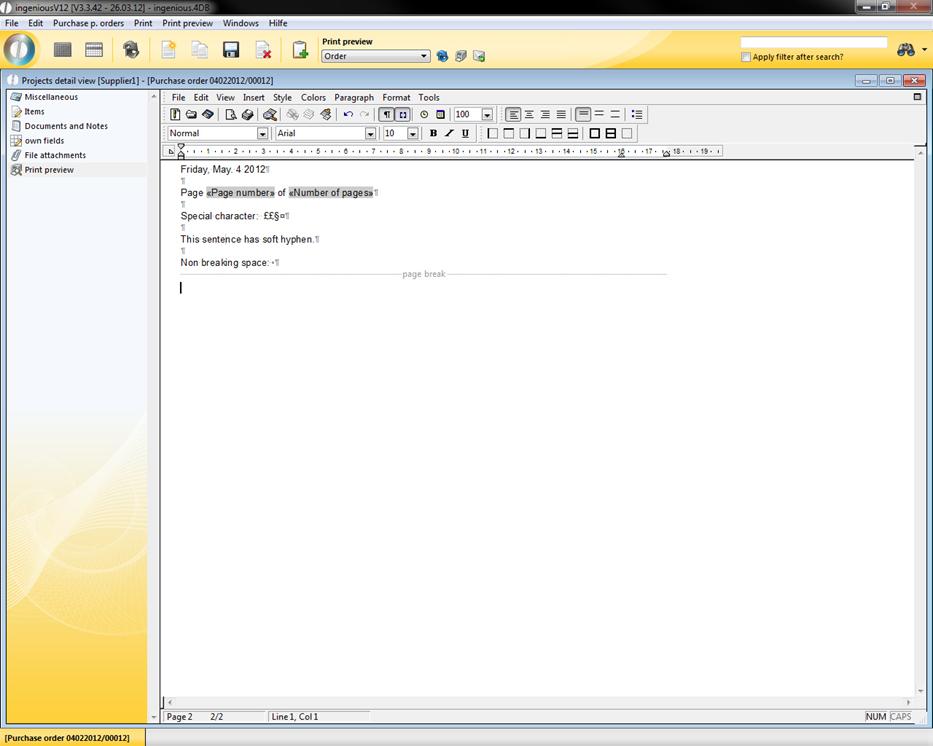
The first entries in this menu are “Date and time...” and “Page number...”. With these two menu items, you can insert the current date with the current time (according to computer clock) and/or the page number, with the current cursor position. If you select the menu item “Special characters“, a window opens in which diverse characters such as B. ©, §, ¾, Š, £, ¥, ‰ ã%U§ are available. The entry “Flexible hyphenation” inserts an invisible character at the current cursor position that is responsible for the separation of words. With the “Fixed space” option, you can insert a space that appears as a normal character in word processing. That means that words that are connected to a space are considered as one word and therefore cannot be separated at the end of a line. The entry “Page break” determines that the following texts will be written on a new page.
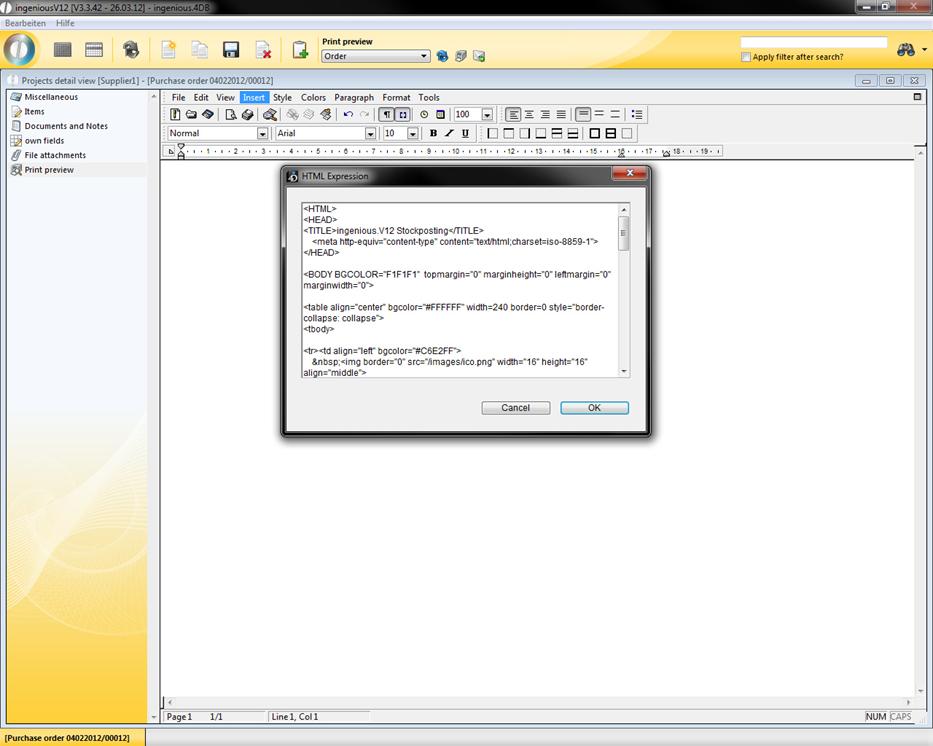
The “HTML Print-out” item offers you the possibility to create an HTML code. However, this code is not visible in the normal view of the document. In order to see it, you must select the option “References in the in the “Display” menu.
Window to compose an HTML code
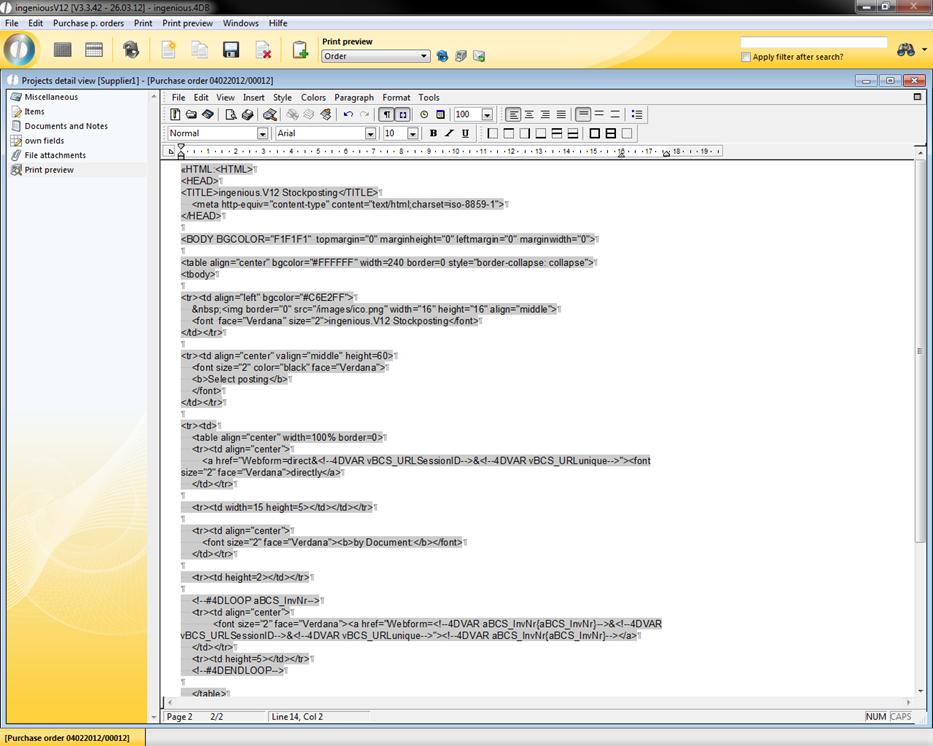
View of the HTML code as a reference
In order to create a HTML document from another document, you must save it as such. Your “Browser” can display it then as an internet page. With the menu item “Hyperlink” you can link actions to certain words.
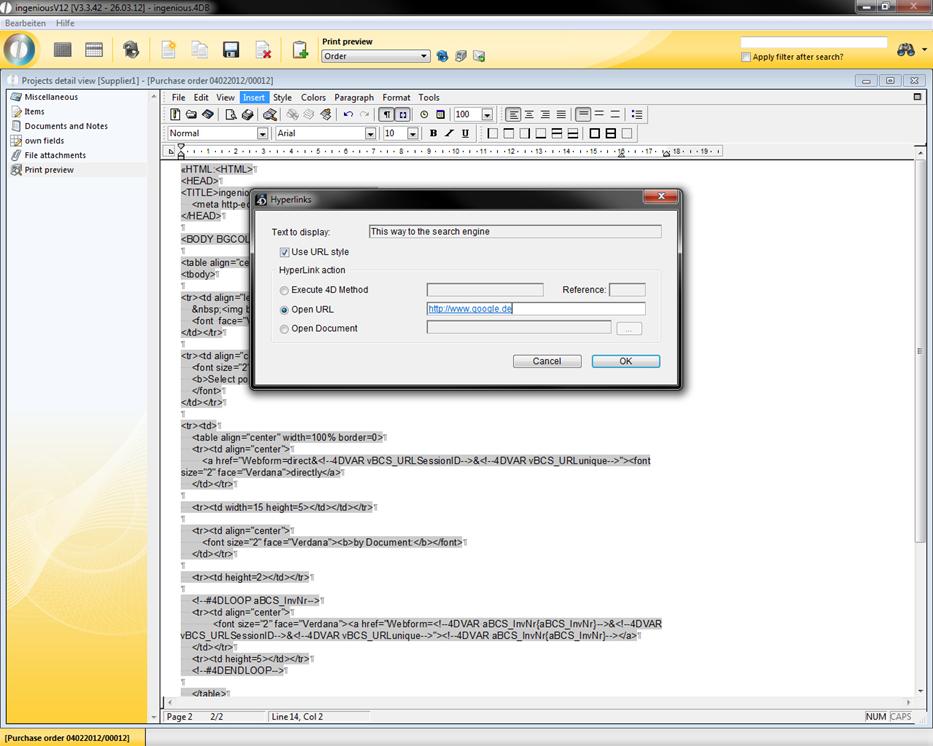
In the above example, a browser window would open with the appropriate internet page if there is an internet connection by clicking on the text “This way to the search engine”. The menu item “4D printout” makes it possible to transfer fields from the database to the document. They are a link to the database of Ingenious.V12. That is very helpful for serial print-outs, for example. In the following example, a header is created with the help of 4D printouts.
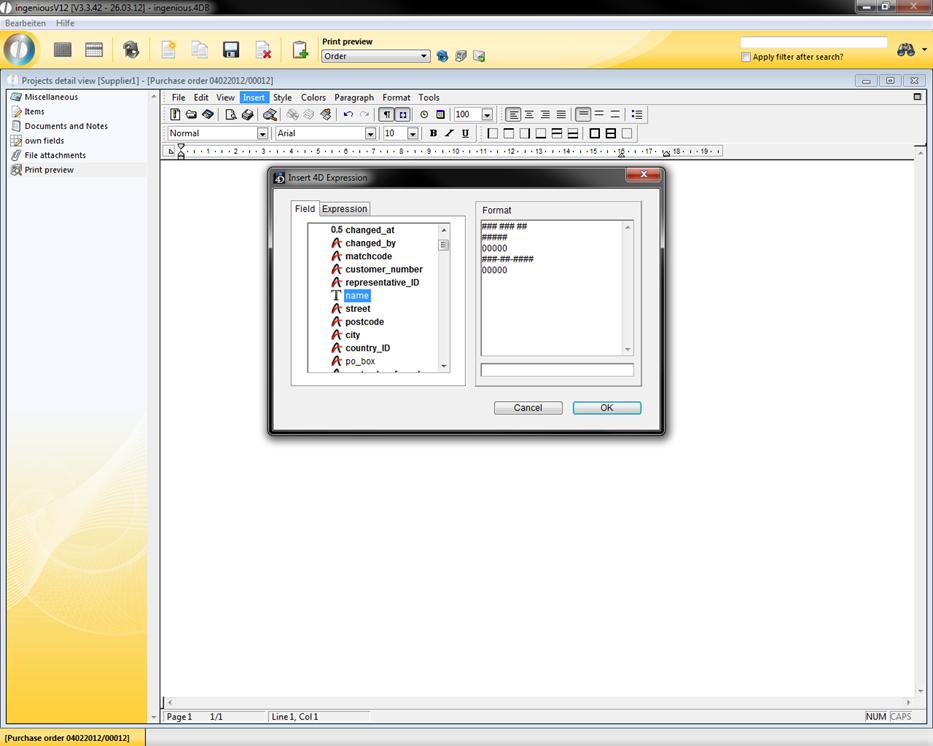
Window for entering 4D printouts
This letterhead is dependant on the current record, as well as on the current date.
Tip: If you copy the text and insert a different record, you only have to complete the menu item “Tools/Calculate references now” and references will automatically upgrade your values.
Menu item “Style“
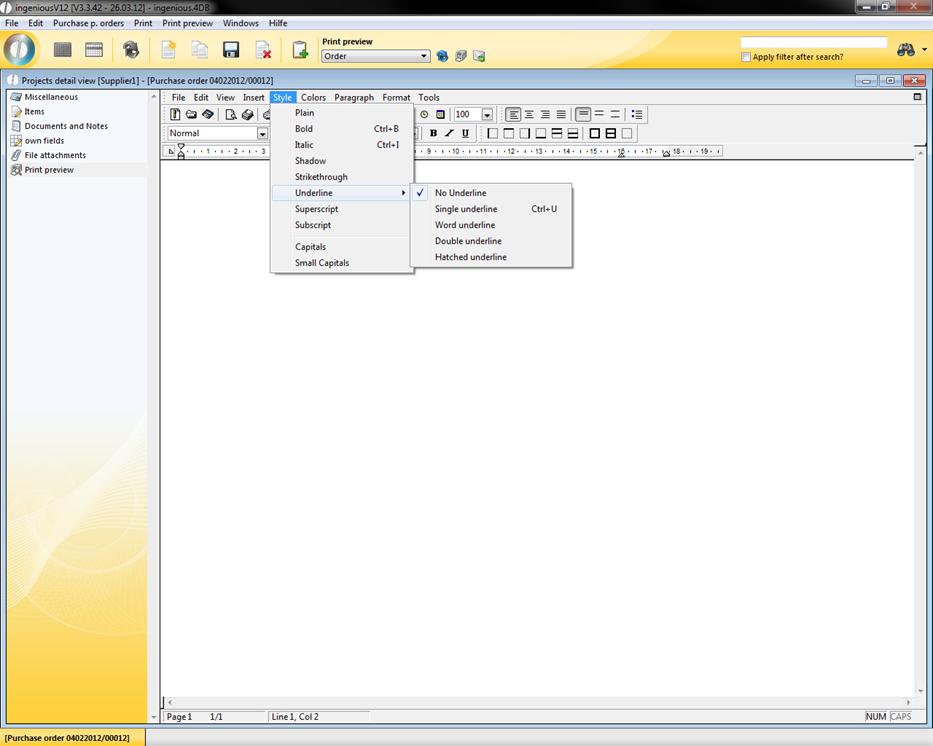
In the menu item, “Style” you will find numerous possibilities to format a highlighted area. Thus you can underline texts in different variations or set them as high and/or low. In the menu item “Capital letters” you indicate to the editor that all letters must be capital letters. Behind “Caps” there is a hidden preset text (i.e.: in this line caps are unlocked. IN THIS LINE CAPS ARE LOCKED.
Menu item “Colors“
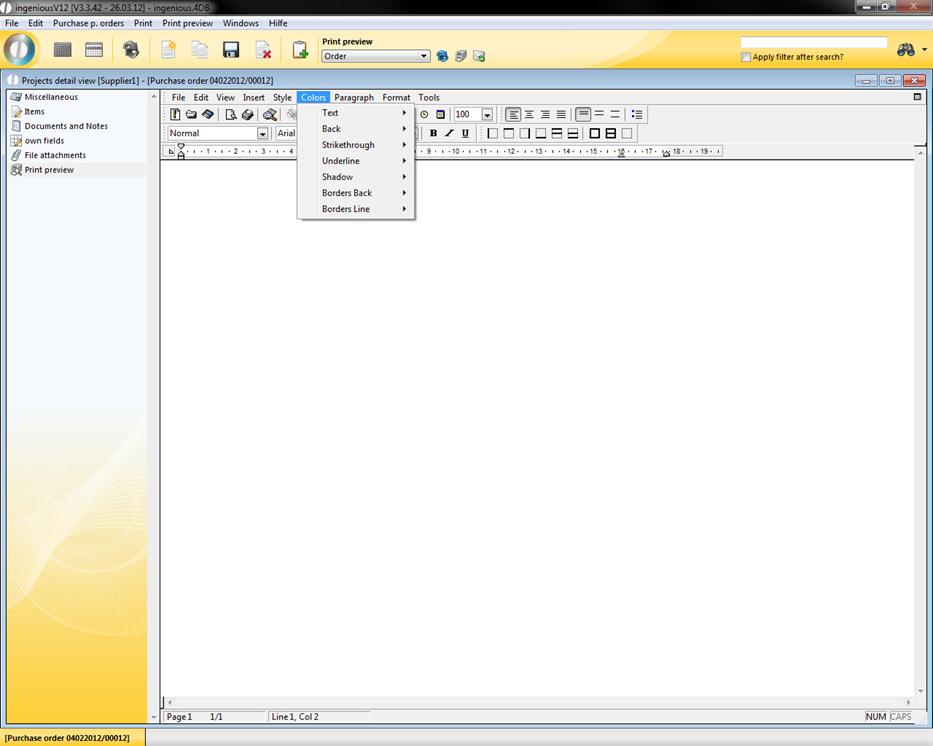
In the “Color” menu item you have comprehensive possibilities to create a document in the colors that you desire.
Menu item “Paragraph”
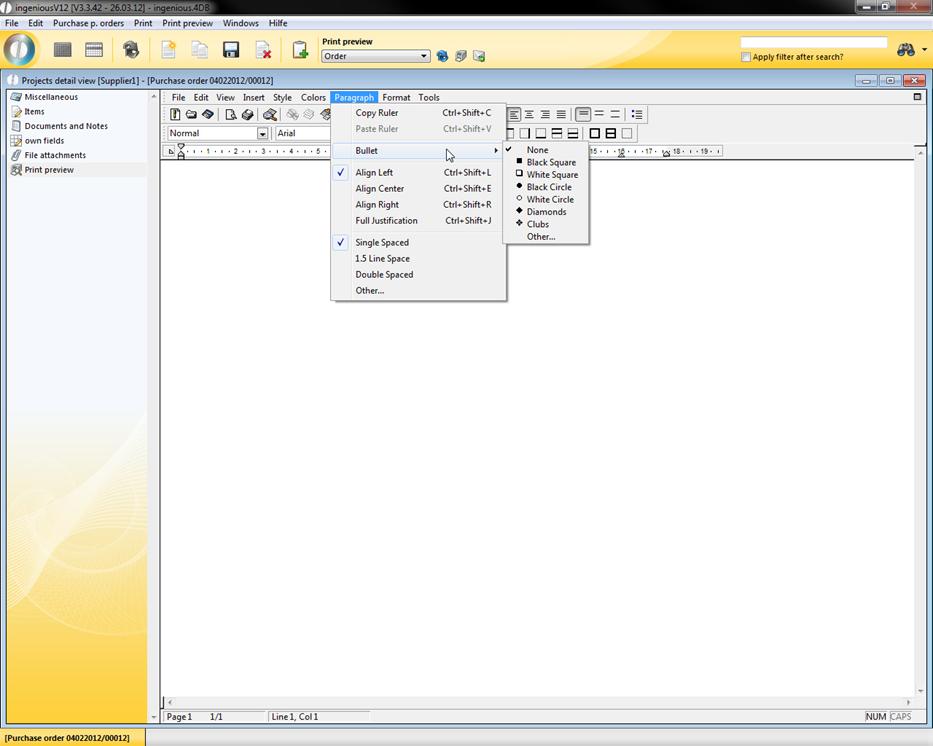
In the “Paragraph” menu item you will find setting possibilities to modify line spacing and justification of paragraphs. In addition, you can select the form of the numeration symbol (bullet).
The “Copy ruler” entry saves the setting of the ruler, as well as the beginning and end of the document, as well as the preset tabs. “Insert ruler” modifies the current ruler setting to the saved setting.
“Format” menu item
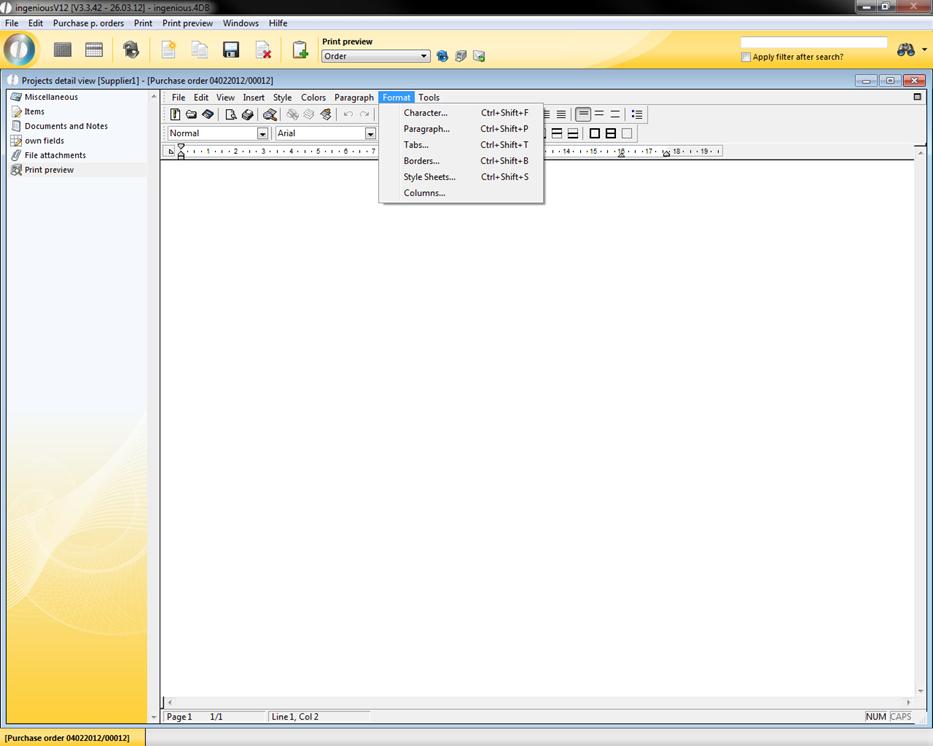
As the name implies, the “Format” menu contains all the possibilities for formatting your document. With the help of the sub points of this menu, you can insert columns into the document, create style models, set frames and specify paragraphs. You also can change font styles and font sizes. Behind the “Characters” menu item, a window is hidden with numerous possibilities for forma ting a text.
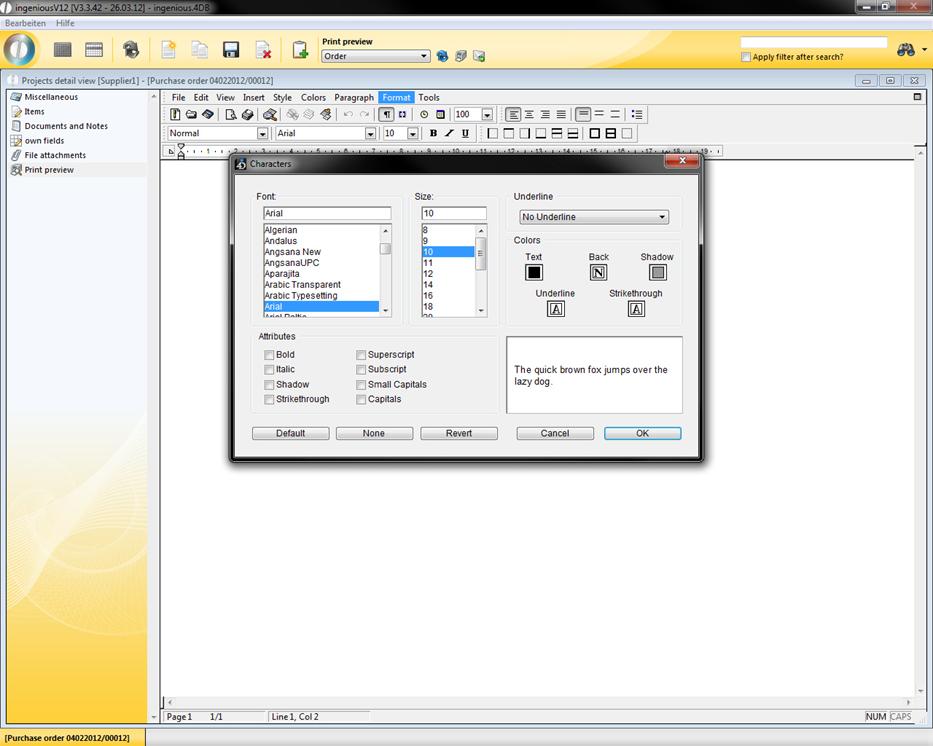
Window for formatting texts
Paragraphs can be edited with the “Paragraphs” menu. Here you have the possibility to set the text size, justification and line spacing.
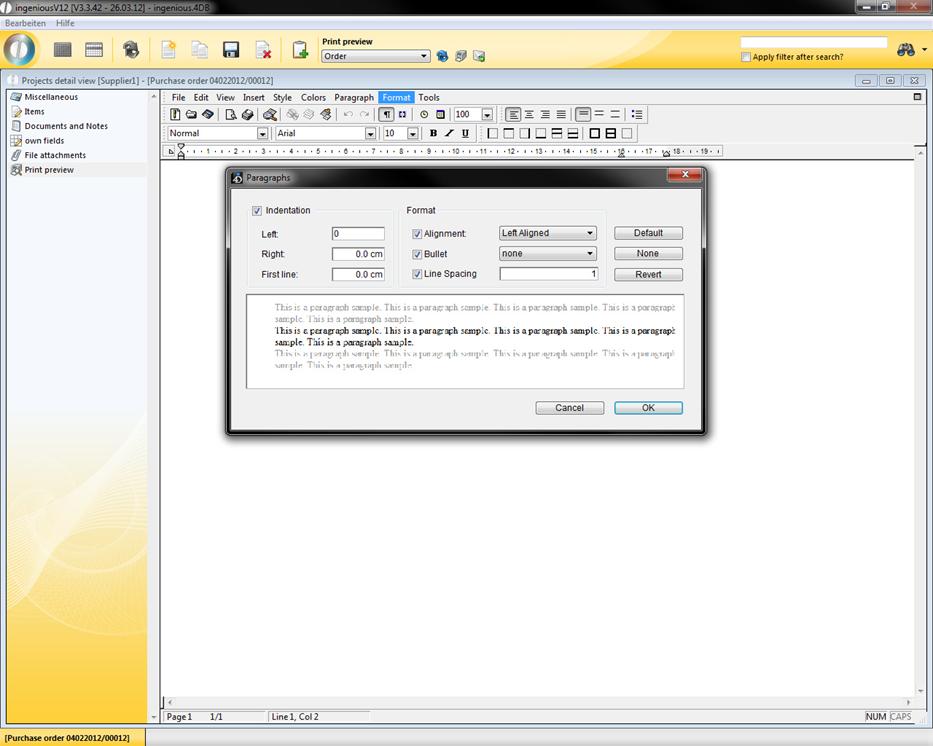
Window for formatting paragraphs
With a click on the “Tabs” menu item, a window opens in which you will find all the settings for tabs. In the “Position” area you can specify where the tab should be located. With the “Alignment” field, you can set the formatting of the document in the area of this tab. In the “Executive” area you can determine with which sign the line should be filled out up to the first tab when you update the tab key.
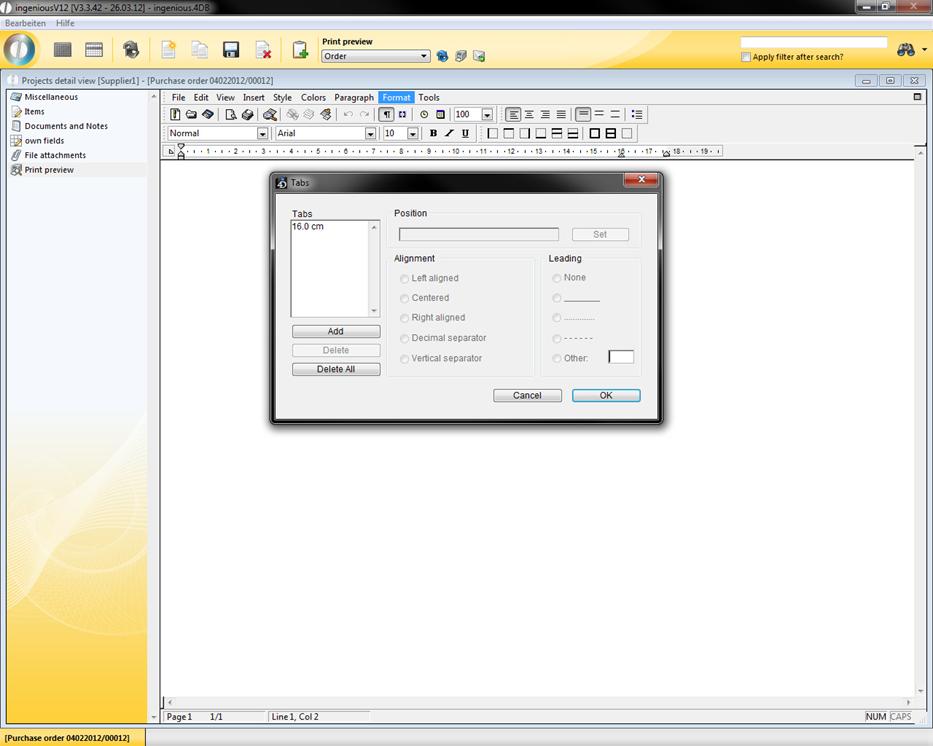
Window for tab properties
In the “Border” menu, you can select the border style, border color and the background color of a framed area. In addition, you can individually determine where the border should be (only above and below, only left, right and above, between the individual lines …).
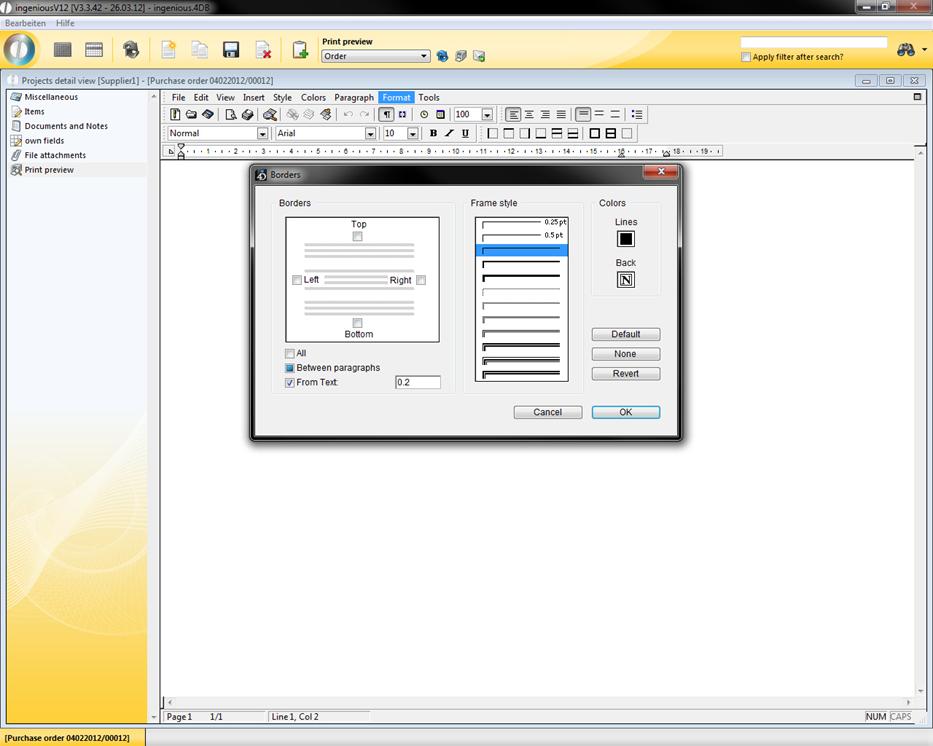
Window for creating a border
The entry, “Style templates” in word processing by Ingenious.V12 also offers you the possibility to save formats and make them usable for other texts. In addition, you can also create or import new formats.
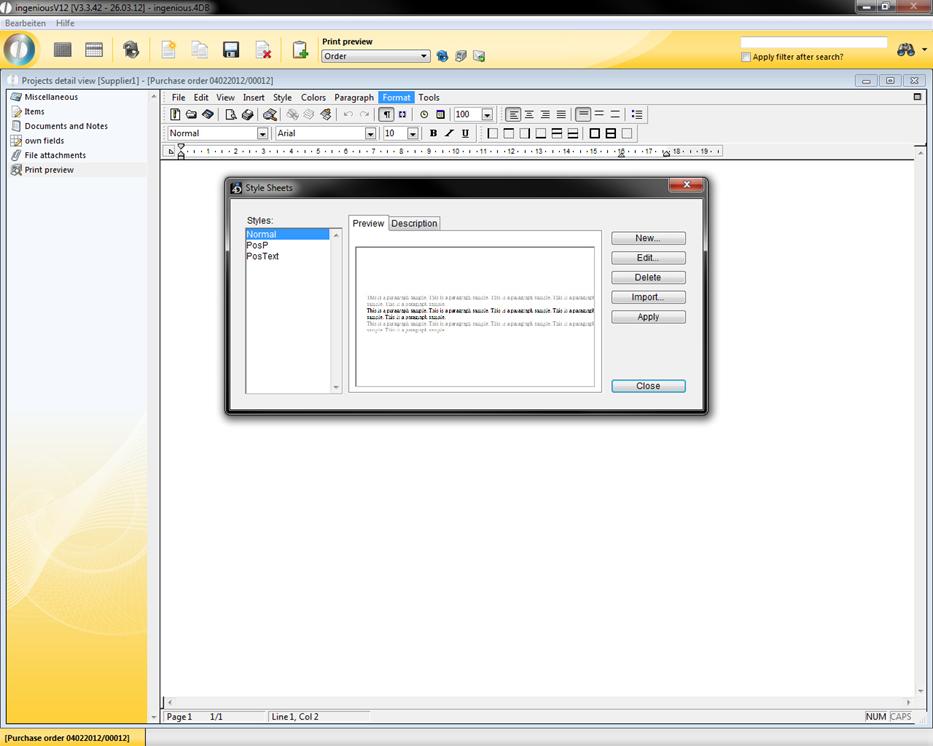
Window for creating style templates
In order to divide a document into several columns (max 10), you will find all the settings in the “Columns…” menu item
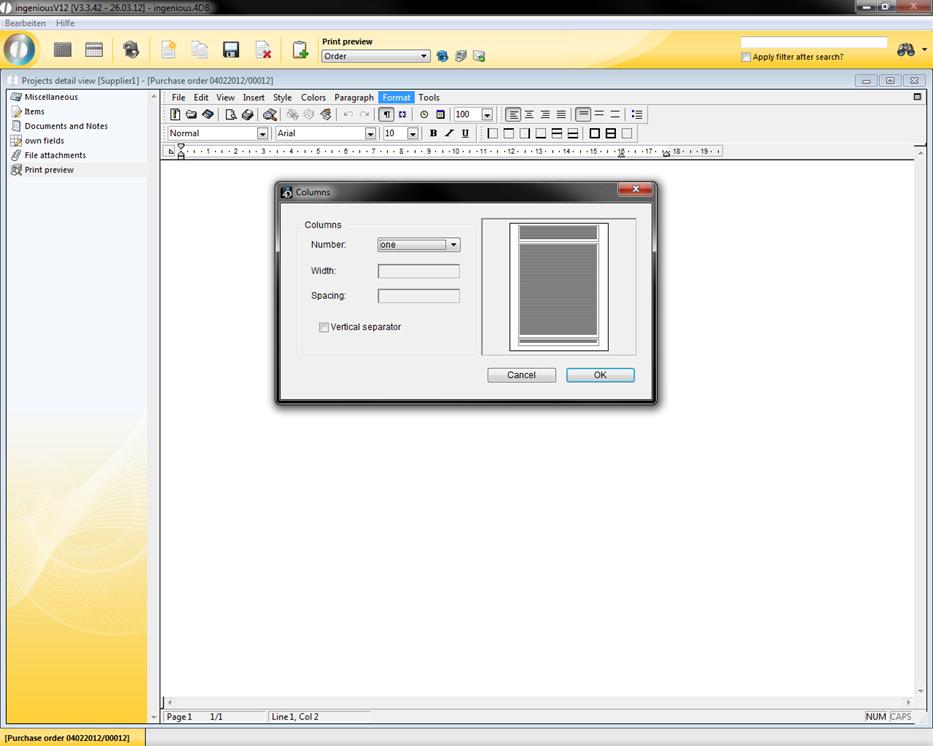
Window for entering columns in a document
”Tools” menu item
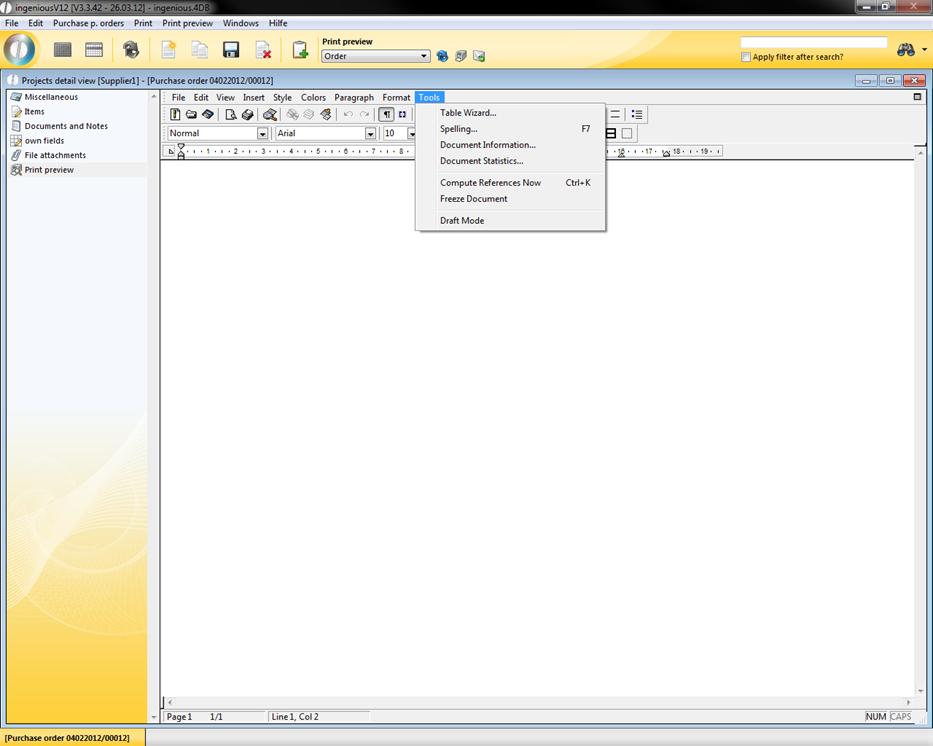
In order to create a table, the “Table Assistant” entry is helpful. When you click on this menu item, a window opens to create a table. Here you can specify the number of the columns, lines as well as the color configuration. With the menu item “Spelling” you can check the text for spelling errors. In the menu item “Languages” you can select a language. The spell check will be operated relevant to the language. You can assign additional information such as author, company and date created to your document with the menu “Document information”. The entry “Document statistics” provides information about the number of columns, pictures, hyperlinks, words or lines that are in the document. The menu item “Calculate references now” prompts the text editor to check the references for all items. This is necessary only because the “Page number” reference is automatically updated. If an item from the database to which you refer with the link (“4D Printing”) changes in the document, you must click on “Calculate references” to prompt the update of the document. With the menu item “Modify references”, you can modify references to normal text. Thus the current value of the reference will be forever stored in the document. Caution! A once modified reference cannot be reversed. In that case, you must insert a new reference. With the menu item “Layout mode” you can possibly accelerate the word processing. Standard mode is “WYSIWYG”. That means that the definitions for print fonts are read by the printer drive of the selected printer. The text input could be possibly slower then. That depends on the operating system (especially windows 98) printer drives and the help programs existing on the computer. In this case you may deactivate the “WYSIWYG” mode. For this you select the layout mode. You should deactivate this mode when creating a new page configuration for the screen. Printing is always done in “WYSIWYG” mode.
The tool bars
The tool bars provide quicker, easier access to the functions of the menu bar. Because some icons clearly differ from the Microsoft standard, a short description of the utilized icons for word processing by Ingenious.V12 follows. You can obtain similar illustration texts when you hold the cursor a short time above a symbol.
![]() Create a new document
Create a new document
![]() Open a document
Open a document
![]() Save
Save
![]() Page view
Page view
![]() Printing
Printing
![]() Search
Search
![]() Cut
Cut
![]() Copy
Copy
![]() Paste
Paste
![]() Back or forward
Back or forward
![]() Display or hide non-visible signs
Display or hide non-visible signs
![]() Display or hide references
Display or hide references
![]() Enter current time
Enter current time
![]() Enter current date
Enter current date
![]() Justification
Justification
![]() Line spacing
Line spacing
![]() Bullets
Bullets
![]() Text formatting (bold, cursive, underline)
Text formatting (bold, cursive, underline)
![]()
![]() Borders
Borders
Word processing in the item detail view
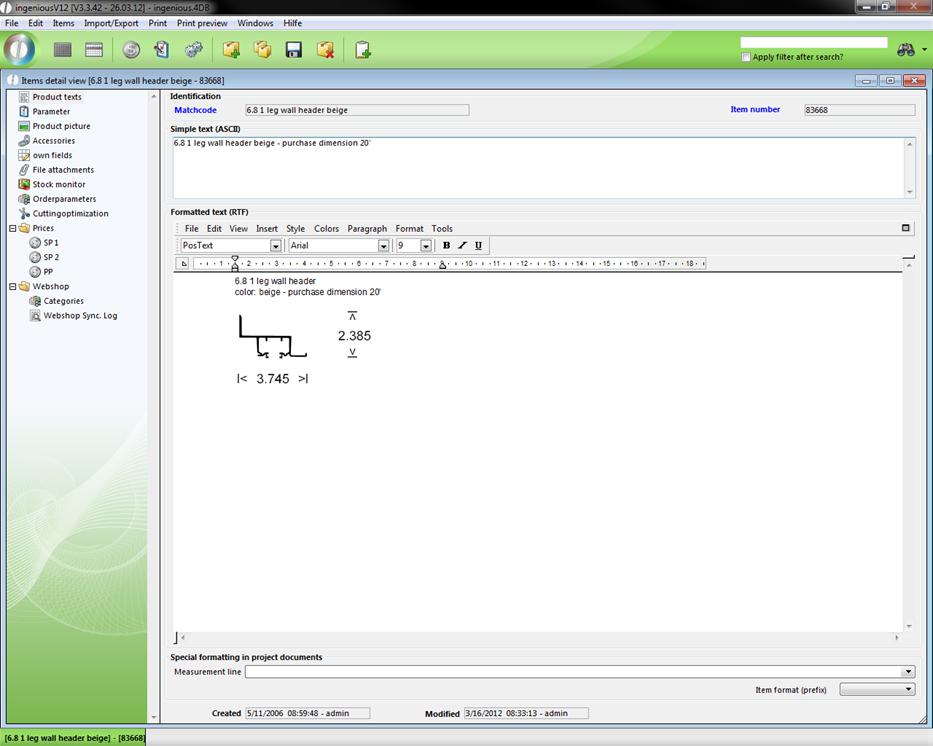
Word processing in the “Article” module has been developed especially as a supplement to “Simple text (ASCII)”. Here you can only input unformatted texts. With “RTF” (Rich Text Format” = “Comprehensive text formations”) in contrast, you have full composition freedom in paragraph, color, graphics, font,…of modern word processing.
Thus you have the possibility to file complete descriptions of an article. The link to article illustrations also does not pose any problems. These illustrations can be later printed on the offers for these articles.
Word processing in the project detail view
Word processing in the “Workflow” modules also has a pop-up field with the name “Project template”.
In this pop-up field you can retrieve diverse project templates that you saved in the text administration module. By default, the preset document template for the respective project status will be used. Simply select a preview and then confirm with the ![]() button.
button.
These views will be generated with the respective data and made available. Because pictures of the article only make sense in the quotes, the document template “Quote” is set as default in “RTF Text” as “PosText Source”. In order to modify that in a single document, the “PosText Source” pop-up field will be in the detail view of each project in the “Parameter” column. Of course you can also use word processing as usual and create and print your own documents.